10.9开发MVC4Web程序应用举例
10.9 开发MVC 4 Web程序应用举例
学习目标
进一步理解模型、视图、控制器的作用和用法。
本节将以一个简单的学生信息展示为例,来演示结合数据库开发MVC 4 Web应用程序流程步骤。通过例子进一步理解MVC 4 Web系统中模型、视图、控制器的作用和用法。
例子完整代码参见:Code/ch10/Study_MVC4_Solution/ Student_MvcApplication。
(1)准备数据库mydb中的student脚本代码,然后在学生表student中添加一些模拟数据信息。学生表student脚本代码如下。
CREATE TABLE [dbo].[student](
  [id] [int] IDENTITY(1,1) NOT NULL,
  [name] [varchar](50) NULL,
  [sex] [char](2) NULL,
  [city] [varchar](50) NULL,
  [birthday] [datetime] NULL,
  [note] [varchar](200) NULL
) ON [PRIMARY]
(2)启动Visual Studio 2012,选择“文件”|“新建”|“项目”命令,然后在弹出的对话框中选择“ASP.NET MVC 4 Web应用程序”,并给项目命名为“Student_MvcApplication”,显示如图10-22所示。
在图10-22对话框中,本次为了理解ASP.NET MVC 4项目的一些低层含义,选择“空”模板来创建,另外视图引擎选择“ASPX”,然后单击“确定”按钮,到此为止,一个ASP.NET MVC 4空项目就创建完成了。
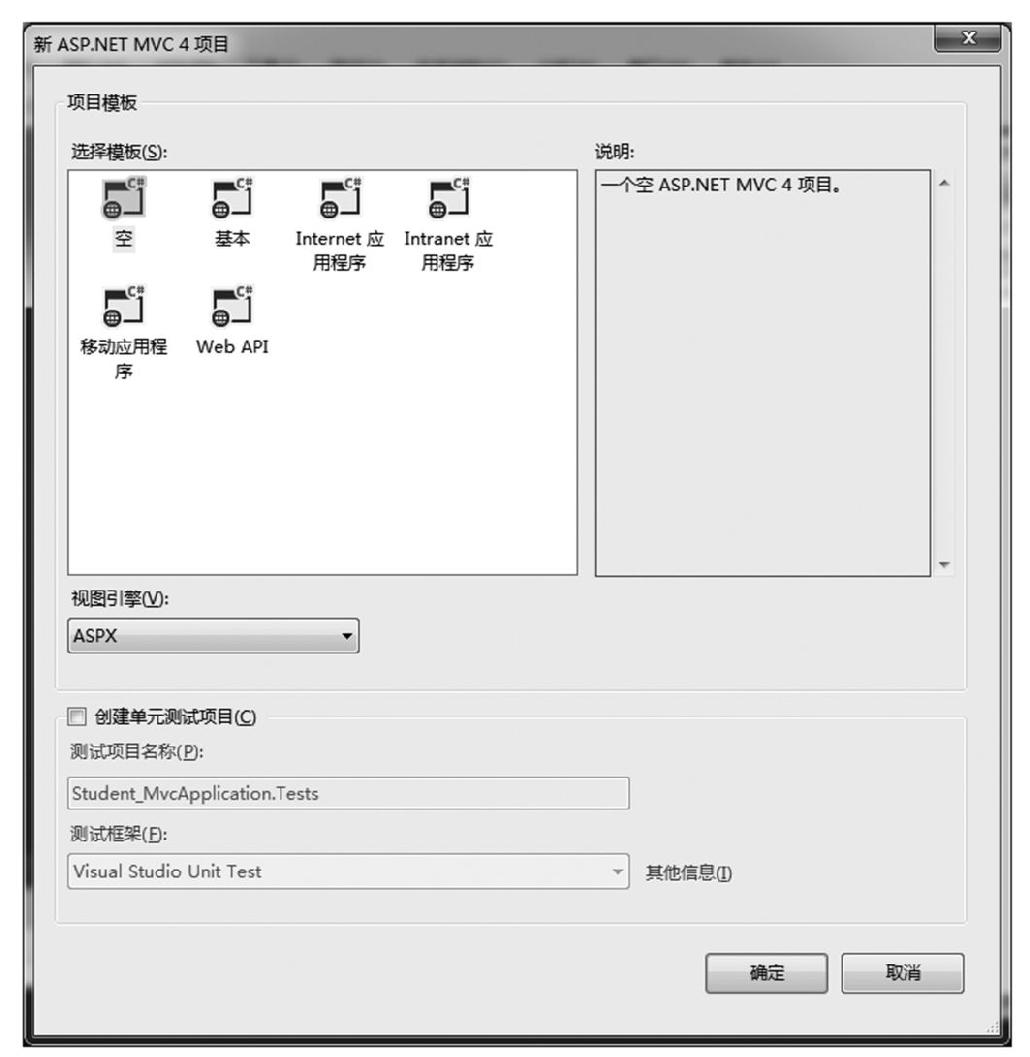
图10-22 新建ASP.NET MVC 4项目窗口
(3)刚创建好的ASP.NET MVC 4空项目文件列表如图10-23所示,可以看出没有任何控制器、模型、视图,完全都需要自定义完成。
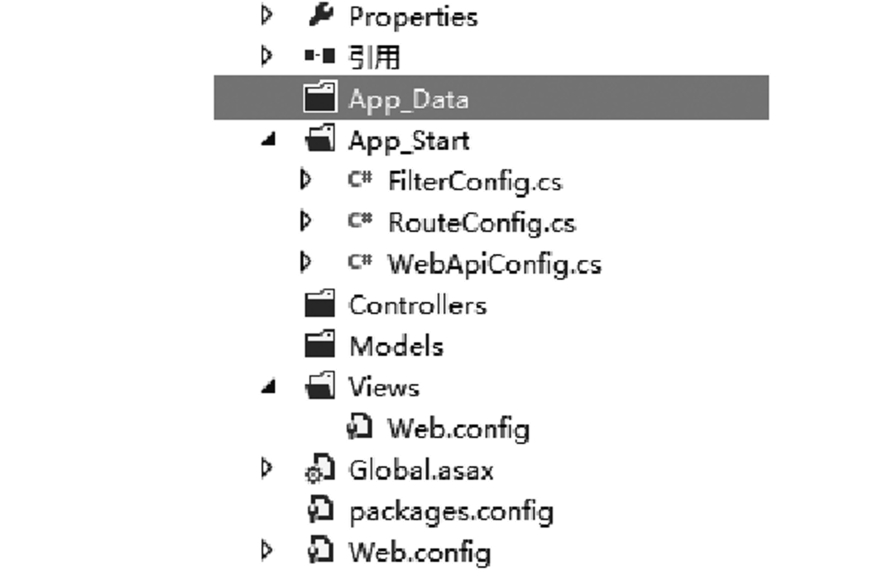
图10-23 ASP.NET MVC 4空项目文件列表
(4)接下来的项目操作涉及mydb数据库,于是需要用到DBHepler这个数据库操作通用类,从第7章中把DBHelper.cs这个类文件复制到当前项目的Controllers文件夹中,并修改数据库名称、账号、口令为当前正在用的相关信息。
(5)创建控制器文件StudentController.cs,接下来给出该文件的源代码。
public class StudentController : Controller
  {
    //
    // GET: /Student/
    DBHelper db = new DBHelper();
    public ActionResult Index()
    {
       return View();
    }
    public ActionResult List()
    {
       string sql="select id,name from student order by id asc";
       ViewBag.StudentList = db.GetTable(sql);
       return View();
    }
    public ActionResult Detail(int? id)
    {
       if (id == null)
       {
          return View("Index");
       }
       else
       {
          string sql="select id,name,sex,city,birthday,note from
          student where id=" + id;
          ViewBag.Student = db.GetRow(sql);
          return View();
       }
    }
  }
(6)修改URL路由配置文件RouteConfig.cs,修改后的源代码如下。
public class RouteConfig
  {
    public static void RegisterRoutes(RouteCollection routes)
    {
       routes.IgnoreRoute("{resource}.axd/{*pathInfo}");

       routes.MapRoute(
          name: "Default",
          url: "{controller}/{action}/{id}",
          defaults:new{controller="Student",action= "Index",id
          = UrlParameter.Optional }
       );
    }
  }
(7)进入项目的Views文件夹,添加3个视图,即Index、List、Detail。在Student Controller.cs文件中的Index()方法体中右击,然后选择“添加视图”,在弹出的对话框中,输入视图名称Index(其实默认名称就是Index),视图Index.aspx文件源代码如下。
<%@ Page Language="C#" Inherits="System.Web.Mvc.ViewPage<dynamic>" %>

<!DOCTYPE html>

<html>
<head runat="server">
  <meta name="viewport" content="width=device-width" />
  <title>Index</title>
</head>
<body>
  <div>
    <a href="/Student/List">查看学习列表</a><br />
  </div>
</body>
</html>
(8)使用和步骤(7)相同的方法可以创建List视图,视图List.aspx文件源代码如下。
<%@ Page Language="C#" Inherits="System.Web.Mvc.ViewPage<dynamic>" %>

<!DOCTYPE html>
<html>
<head runat="server">
  <meta name="viewport" content="width=device-width" />
  <title>List</title>
  <style type="text/css">
    * {
       font-size: 14px;
       font-family:微软雅黑,宋体;
    }
  </style>
</head>
<body>
  <div>
    <table cellpadding="0"cellspacing="0"style="width: 600px;border:
    1px solid #ff6a00; padding: 0px; margin: 0px;">
       <tr>
          <td style="width: 150px; height: 30px; border-
          bottom: 1px dotted #ff6a00;">编号</td>
          <td style="width: 300px; height: 30px; border-
          bottom: 1px dotted #ff6a00;">姓名</td>
          <td style="width: 150px; height: 30px; border-
          bottom: 1px dotted #ff6a00;">操作</td>
       </tr>
       <%
          System.Data.DataTable table = ViewBag.StudentList;
          for (int i = 0; i < table.Rows.Count; i++)
          {
       %>
       <tr>
          <td style="height: 30px; border-bottom: 1px dotted
          #ff6a00;"><%=table.Rows[i]["id"].ToString () %></td>
          <td style="height: 30px; border-bottom: 1px dotted
          #ff6a00;"><%=table.Rows[i]["name"].ToString () %></td>
          <td style="height: 30px; border-bottom: 1px dotted
          #ff6a00;"><a href="/Student/Detail/<%=table.
          Rows[i]["id"].ToString()%>">查看详细</a></td>
       </tr>

       <%
          }
       %>
    </table>

  </div>
</body>
</html>
(9)使用和步骤(7)相同的方法可以创建Detail视图,视图Detail.aspx文件源代码如下。
<%@ Page Language="C#"Inherits="System.Web.Mvc.ViewPage<dynamic>"%>

<!DOCTYPE html>

<html>
<head runat="server">
  <meta name="viewport" content="width=device-width" />
  <title>Detail</title>
</head>
<body>
  <div style="font-size: 12px; font-family:微软雅黑,宋体">
    <%
       System.Data.DataRow row = ViewBag.Student;
    %>
    <table cellpadding="0"cellspacing="0"border="0"style="border:1px
    solid #ff6a00;">
       <tr>
          <td style="width:100px;height:35px;border-bottom:1px
          dotted #ff6a00">编号</td>
          <td style="width:200px;height:35px;border-bottom:1px
          dotted #ff6a00"><%=row["id"] %></td>
       </tr>
       <tr>
          <td style="width: 100px; height: 35px; border-bottom:
          1px dotted #ff6a00">姓名</td>
          <td style="width: 200px; height: 35px; border-
          bottom: 1px dotted #ff6a00"><%=row["name"] %></td>
       </tr>
       <tr>
          <td style="width: 100px; height: 35px; border-bottom:
          1px dotted #ff6a00">性别</td>
          <td style="width: 200px; height: 35px; border-
          bottom: 1px dotted #ff6a00"><%=row["sex"] %></td>
       </tr>
       <tr>
          <td style="width: 100px; height: 35px; border-
          bottom: 1px dotted #ff6a00">城市</td>
          <td style="width: 200px; height: 35px; border-
          bottom: 1px dotted #ff6a00"><%=row["city"] %></td>
       </tr>
       <tr>
          <td style="width: 100px; height: 35px; border-
          bottom: 1px dotted #ff6a00">生日</td>
          <td style="width: 200px; height: 35px; border-bottom:
          1px dotted #ff6a00"><%=row["birthday"] %></td>
       </tr>
       <tr>
          <td style="width: 100px; height: 35px; border-
          bottom: 1px dotted #ff6a00">备注</td>
          <td style="width: 200px; height: 35px; border-
          bottom: 1px dotted #ff6a00"><%=row["note"] %></td>
       </tr>
    </table>
    [<a href="/">返回主页</a>]
    [<a href="/Student/List">返回学生列表</a>]
  </div>
</body>
</html>
(10)到此为止,相应的代码就全部编写完了。直接按F5快捷键启动调试该ASP.NET MVC 4 Web应用程序,如图10-24所示。然后,就可以通过超链接,进入学生列表页面、详细页面等。
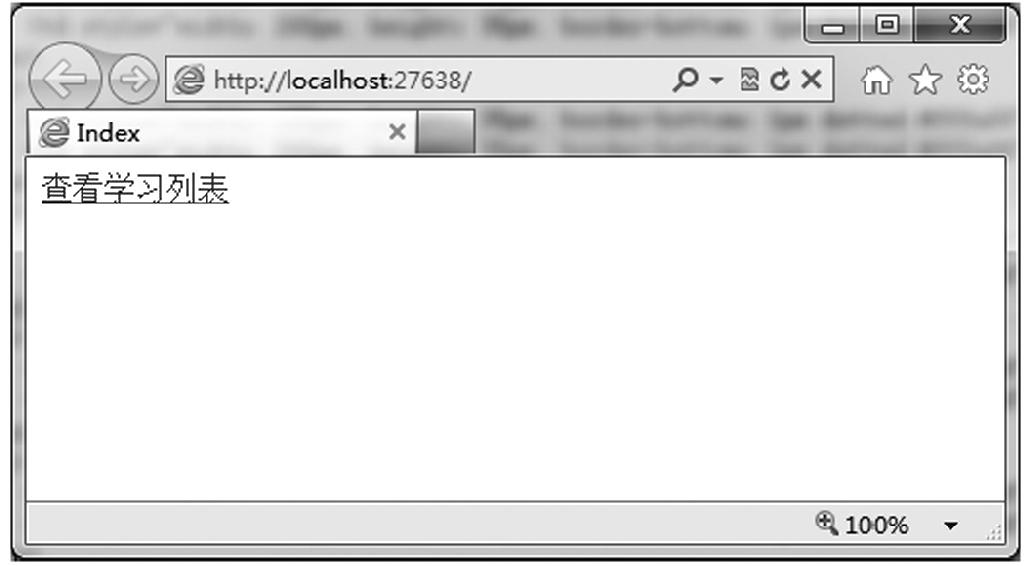
图10-24 访问/Student/Index显示效果
上一篇:10.8理解模型
下一篇:10.10数据分页显示